
There are a number of reasons why you might need to make a clone of your website. You may want to set up a staging environment or local installation for testing purposes, or just save a complete backup of your live website. The process for creating a copy of your website manually is fairly complicated, but cloning your website with the Duplicator plugin will make the process much easier. In this article we’re going to clone a website with Duplicator and show you the steps involved. We’ll be using the free version of the plugin in our examples.
Why Clone Your Website?
Before we start the cloning process, let’s take a look at some of the reasons for creating a clone of your website.
Cloning your website means creating a working copy of your website. The copy will be an exact duplicate of your website’s pages, posts, database and other files. The cloned version will be identical to your live site in almost every respect but they will exist independently of each other and any changes you make to the copy won’t affect your live site. This is useful for:-
- Migrating your site or moving it to a new domain.
- Creating staging website.
- Set up a local WordPress installation.
- Test a new PHP version.
You can also save the cloned website files as a backup so they can be restored if something happens to your live site.
Why Choose Duplicator to Clone your Website?
Duplicator has over a million active installations, a five star rating and it’s free. Duplicator is also easy to use, even for beginners.
How to Clone Your Website With Duplicator
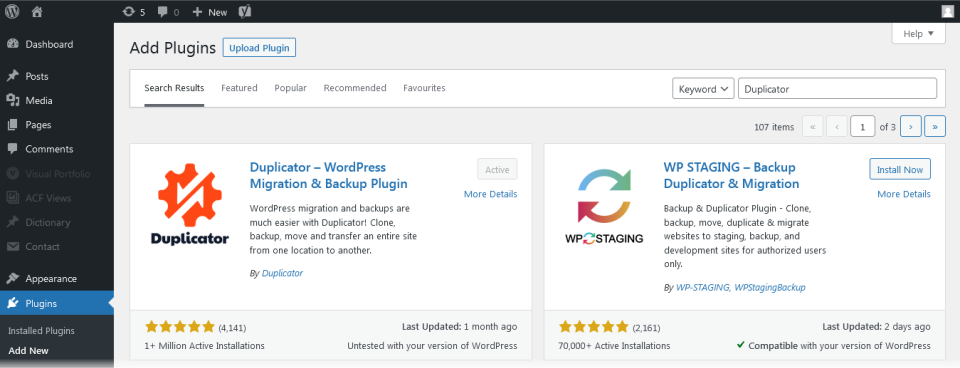
To get started with Duplicator, all you need to do is log in to your WordPress admin area and go to Plugins > Add New. Type “Duplicator” in the search field and it will show up first on the list. You’ll need to install and activate the plugin on the site you want to clone.
Step 1 – Make a Copy of Your Website and Download it
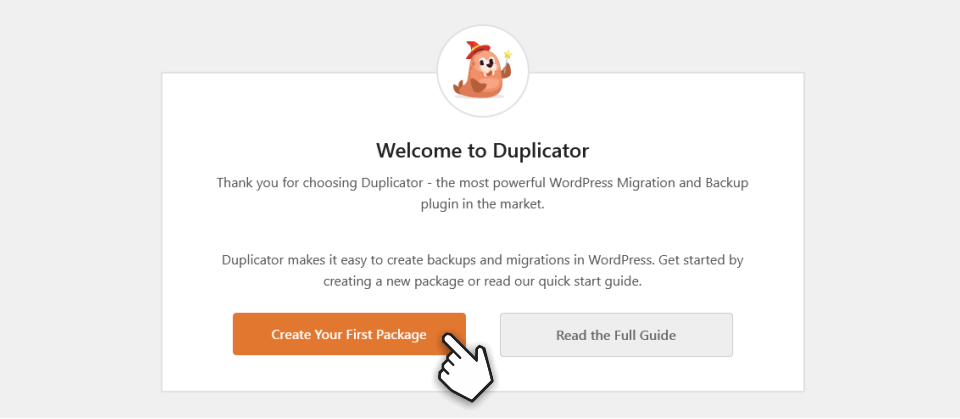
Once you’ve installed and activated Duplicator you’re all set to create a clone of your live website. In the first step we’re going to make a copy of the live website and download it so that we can use it later on to create the clone.
The first thing you’ll see after activating the plugin is the Duplicator welcome screen. Click on Create Your First Package.
What is a Duplicator Package?
The Duplicator plugin creates two files that you’ll use to clone your website. The first file is an Installer which is a PHP file that you copy to the root directory of the new installation. As the name suggests, the installer file will install the duplicated website in the new location.
The second file in the package is an Archive, which is a compressed file containing all the files related to your original website.
The next screen allows you to modify the default installer and archive settings. For our example you don’t need to change anything here, but you could change the name of the package or modify the package and archive settings. Click the Next button in the bottom right hand corner of the screen.

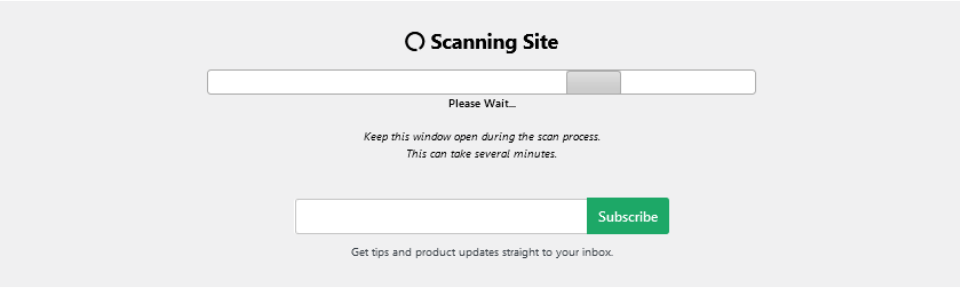
Duplicator will scan your website now for any issues. The scan may take a while depending the size of your website.
When the scan is completed, you’ll see a breakdown of the scan results. It’s not unusual to see a few warnings but you can normally just check the “Yes. Continue with the build process!” box and click the Build button at the bottom of the screen.

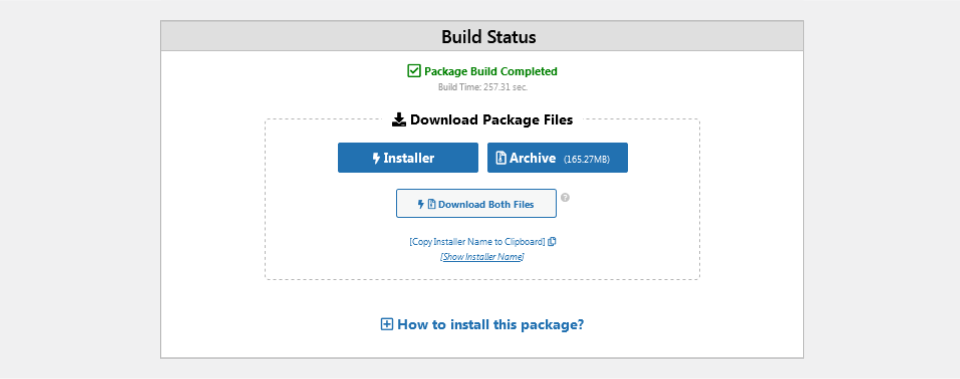
The plugin will need some time now to create your package. The build status screen will open when the package has been created. Click on Download Both Files and save them on your computer. Make a note of where you save them because we’re going to need them later on.
That’s it if you only need a backup of your website. Make sure to save the Duplicator package in a secure location.
Keep reading to find out how to create a database and set up the new clone.
Step 2 – Create a Database for the Cloned Website
In this step we’re going to create a database for the cloned website. Duplicator will use this database to import the content of your original website’s database. We’re going to us cPanel to create a database on a live server.
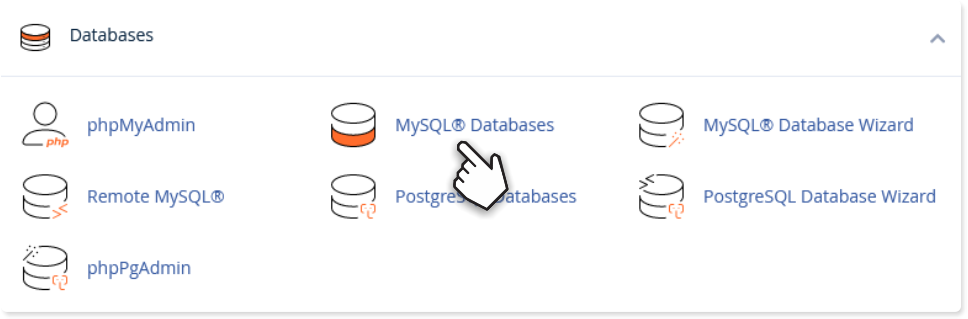
Create a Database with cPanel
- Log in to your hosting account cPanel.
- Find the section to create a new database.
- Click on MySQL Databases.
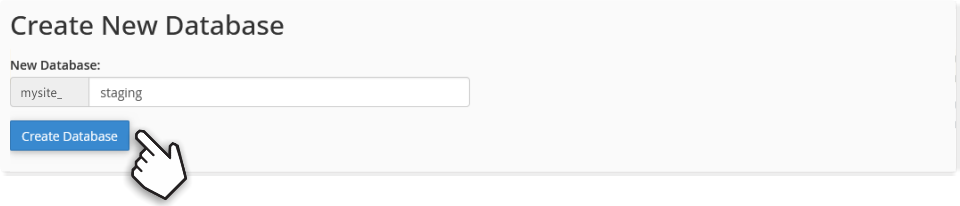
- Enter a name for the new database on the databases screen and click Create Database.
- Scroll down a little further to the Add New User section.
- Enter a name and password for the new user.

- Make a note of the user information because we’re going to need them later. Click the Create User Button.
Creating a Clone of Your Live Website on Your Own Computer
If you want to create a clone of your website on your own computer you will need to set up a local hosting environment. Please see our article on how to set up a local WordPress installation for instructions on how to do this. You won’t need to install WordPress as the Duplicator plugin will handle that for you, but you will need to set up a server and create a database on your computer.
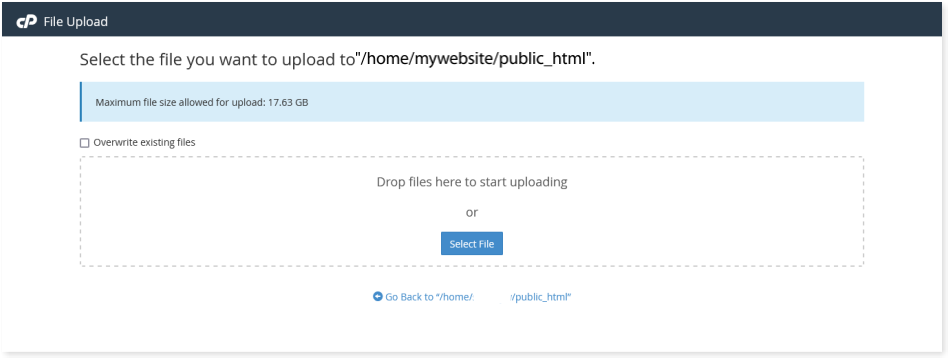
Step 3 – Upload the Copy of Your Website to Your New Server
The next step is to upload the Duplicator package files (Installer and Archive) to the new server with a File Transfer Protocol (FTP) client. You can use FileZilla or your host’s file manger. You must copy these files to your server’s root directory. These will normally be www or public_html.
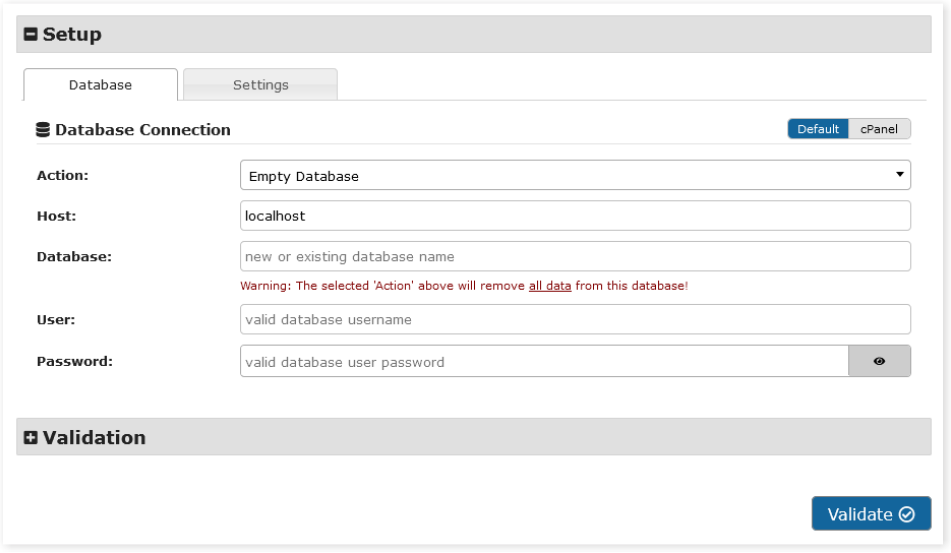
Step 4 – Run the Duplicator Installer
We’re going to access the installer on our server now in the final steps to create the cloned website. The URL will be something like this:-
https://mywebsite.co.za/installer.php
If you’re working in a local environment, the URL might be something like this:-
http://localhost/staging/installer.php
This will open the installer to start the cloning process. In the Setup section, enter the name of the database, the username and password we created in step 2. Click the Validate button when you’re done.
Duplicator will do a check and display the results. Accept the terms and notices and click Next.

Check your website’s URL, installation path and title and click OK.

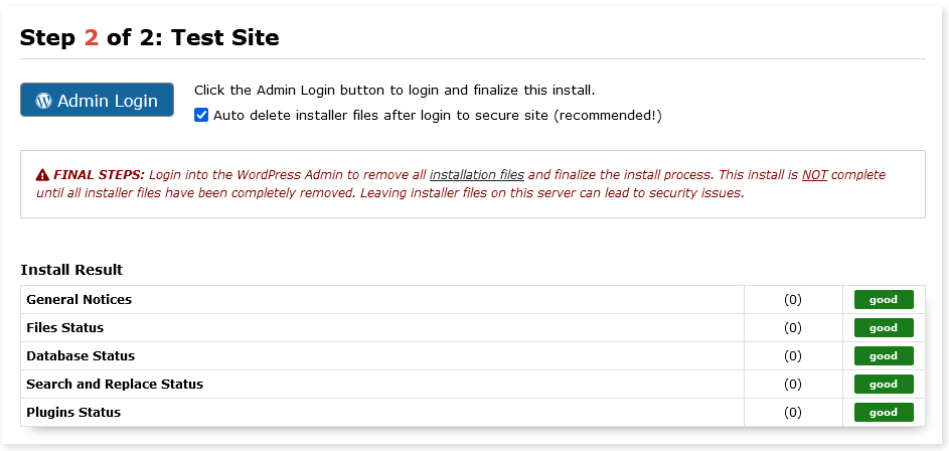
You’ll need to wait a few minutes while Duplicator extracts your website’s files to the new location and installs the database. When this is complete, click Admin Login to finalise the installation. Your login details for the new website will be the same as your original site.
Congratulations, you should now have successfully cloned your website.
Need Help With Your WordPress Website?
Please feel free to contact me if you need help with your website. Visit my home and services pages for more about me and what I do.

Cimeron Collins
Cimeron is an artist and designer based in Edenvale, South Africa, with over 30 years of experience in the printing and publishing industries.
He’s also an avid WordPress enthusiast who strives to stay up to date with the latest trends in web design and development, constantly exploring new technologies and refining his skills.

Leave a Reply