
Setting up shipping correctly is one of the most important steps when launching an online store. Your shipping setup affects delivery costs, customer satisfaction, and the overall checkout experience. If customers see confusing shipping options or unexpected delivery fees, they may abandon their carts before completing a purchase.
Fortunately, WooCommerce offers flexible shipping tools that allow you to create accurate shipping methods and rates for different locations and product types.
In this article, you’ll learn how to set up WooCommerce shipping options, create shipping zones, configure shipping rates, and use shipping classes to charge different delivery fees for specific products.
If you’re just starting out, you may want to read How to Build an E-Commerce Website with WordPress.
Why WooCommerce Shipping Settings Matter
Your shipping strategy directly impacts your e-commerce business. A well-configured shipping system helps you:
- Improve the checkout experience
- Offer accurate delivery costs
- Reduce cart abandonment
- Manage shipping expenses more effectively
- Create location-based shipping rules
- Simplify order fulfillment
WooCommerce allows you to customise shipping settings based on countries, provinces, cities, postal codes, and product types. This flexibility makes it suitable for both small and growing ecommerce stores.
Step 1: Set Your WooCommerce Shipping Locations
Before creating shipping methods, you need to define where your store ships products.
To set your shipping locations:
- Log in to your WordPress dashboard
- Go to WooCommerce > Settings
- Open the General tab
- Scroll to the Shipping locations section
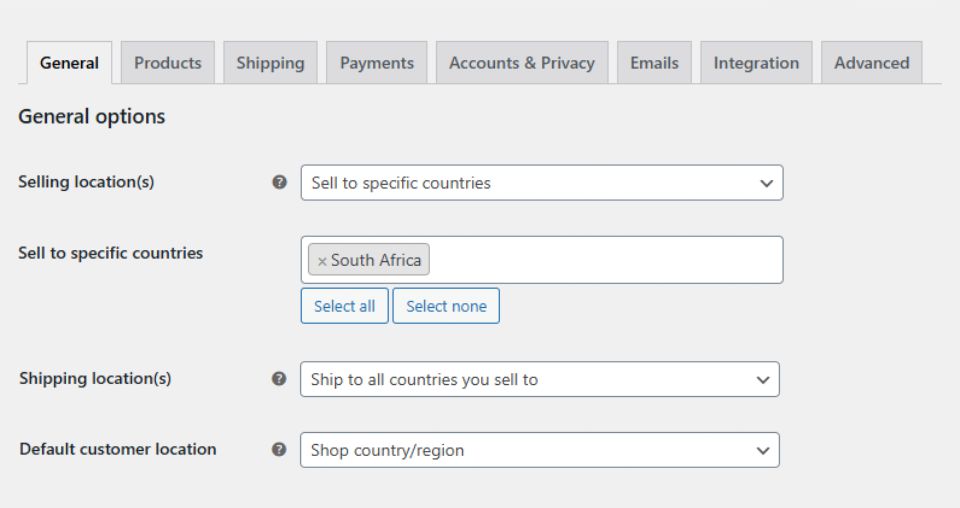
WooCommerce gives you several options, including:
- Ship to all countries
- Ship only to selected countries
- Disable shipping to specific countries
- Ship to all countries you sell to
Most store owners choose the “Ship to all countries you sell to” option because it automatically matches product availability with shipping locations. Save your changes before continuing.
Step 2: Create Shipping Zones in WooCommerce
Shipping zones allow you to create location-specific shipping rules. Each zone can contain different shipping methods and delivery costs.
For example, you can create separate shipping zones for:
- Local deliveries
- National shipping
- International orders
- Specific provinces or cities
How to Add a Shipping Zone
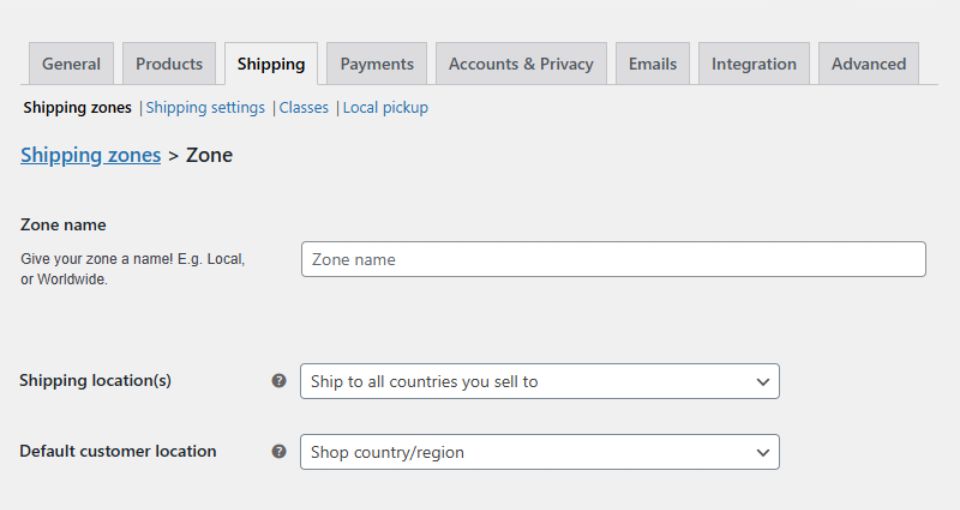
To create a shipping zone:
- Navigate to WooCommerce > Settings > Shipping
- Click Add Shipping Zone
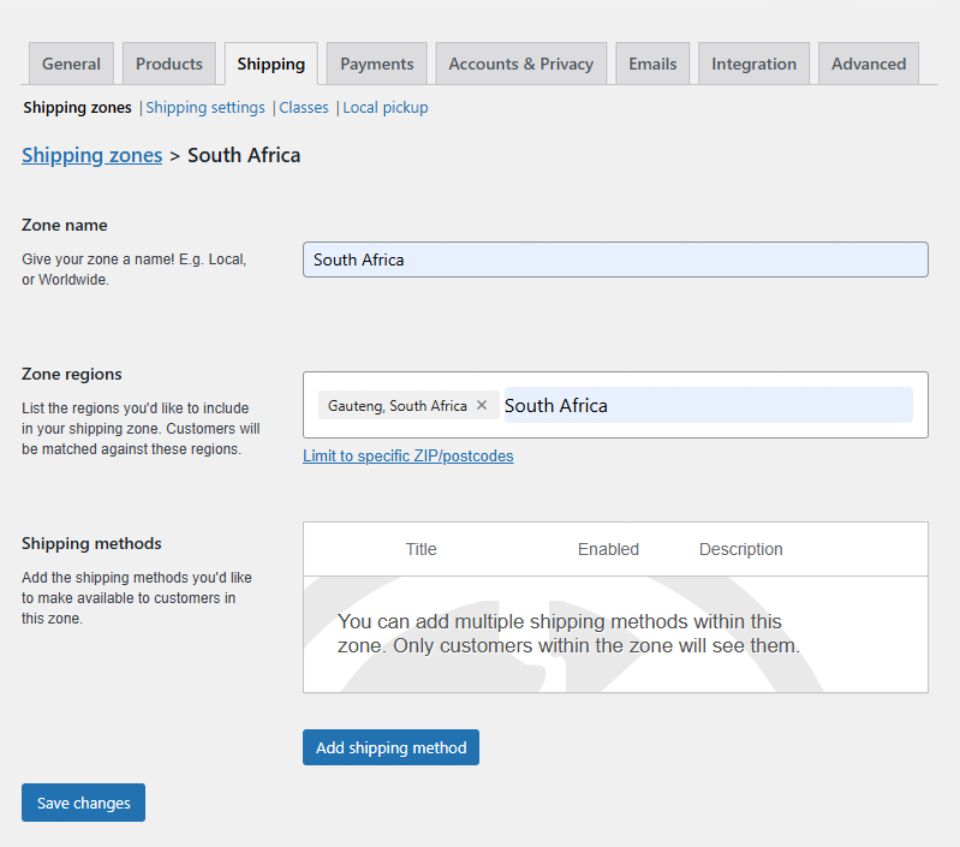
- Enter a Zone Name
- Select the Zone Region
WooCommerce allows you to create zones using:
- Countries
- Provinces
- Cities
- Postal codes
This setup gives you full control over how shipping works in different areas.
Step 3: Add Shipping Methods to Each Shipping Zone
After creating your shipping zones, you need to assign shipping methods to each one.
WooCommerce includes several built-in shipping methods, such as:
- Flat-rate shipping
- Free shipping
- Local pickup
To add a shipping method:
- Open the shipping zone you created
- Click Add Shipping Method
- Select the preferred shipping option
- Configure the settings and pricing
For example, you can:
- Offer free shipping for orders over a certain amount
- Charge a standard delivery fee
- Allow local customers to collect orders themselves
WooCommerce automatically displays the correct shipping methods during checkout based on the customer’s address. This creates a smoother shopping experience for your customers.
How to Configure WooCommerce Shipping Rates
Shipping rates determine how much customers pay for delivery. WooCommerce allows you to create flexible pricing rules that match your business model.
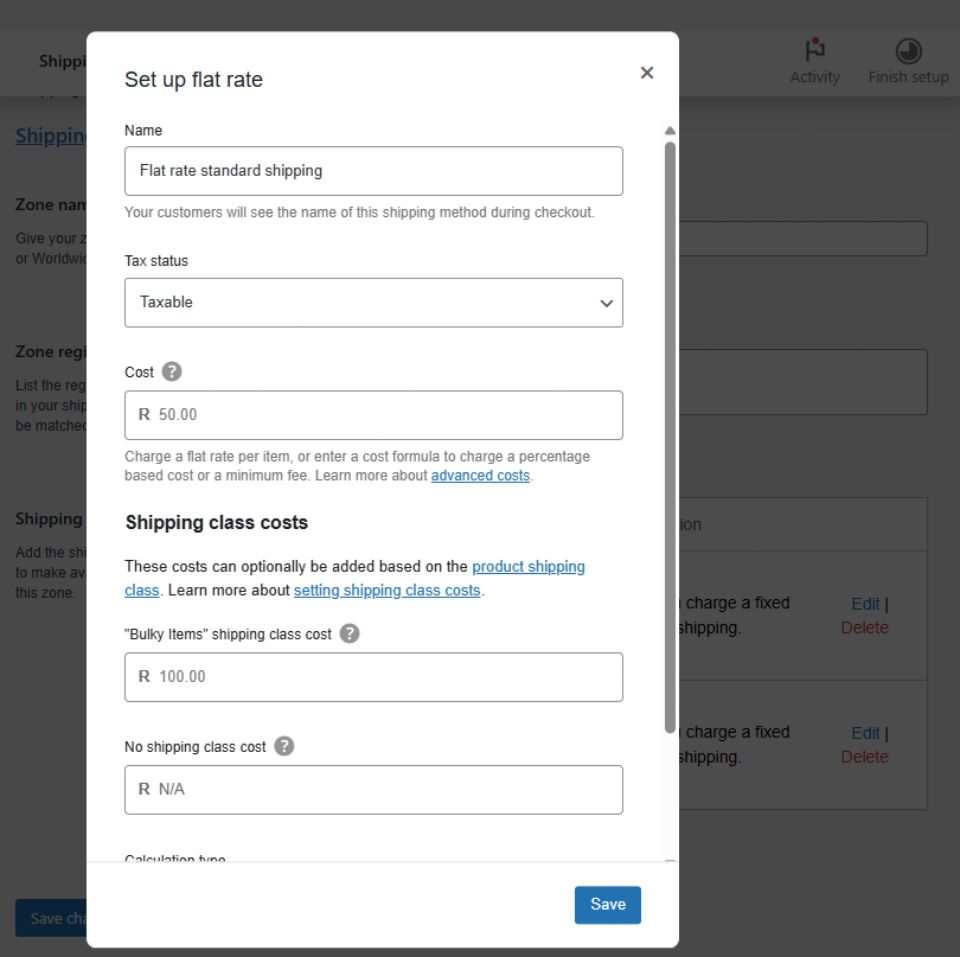
Flat-Rate Shipping Per Order
Flat-rate shipping charges the same amount for every order within a shipping zone.
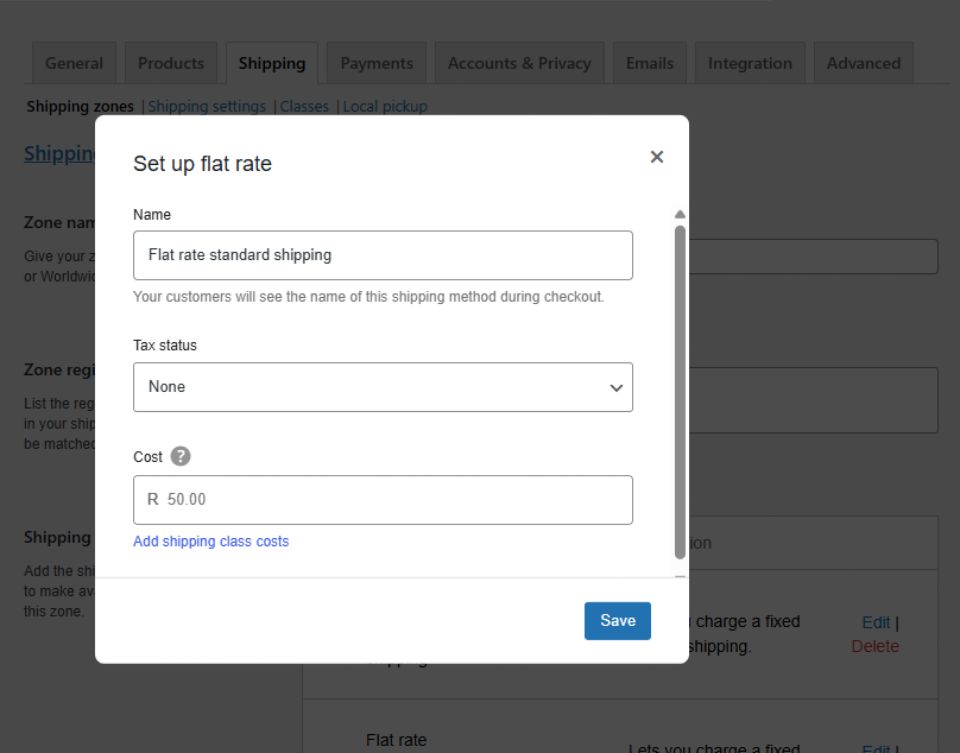
To set a fixed shipping fee:
- Open the shipping zone
- Select the Flat Rate method
- Enter the shipping cost in the Cost field
- Choose the appropriate Tax status
The Tax status setting determines whether tax is applied to the shipping fee. Select Taxable if shipping should include tax, or None if no tax should be charged on shipping.
For example:
- R50 standard shipping
- R99.99 nationwide delivery
This option works well for stores with predictable shipping costs.
Flat-Rate Shipping Per Item
You can also charge shipping based on the number of items in the cart.
Use this formula:
[qty] * 20This formula charges R20 for each product in the order. WooCommerce automatically multiplies the shipping fee by the quantity purchased.
Percentage-Based Shipping Rates
WooCommerce also supports percentage-based shipping fees.
Use this formula:
[cost] * 0.10This setup charges shipping equal to 10% of the customer’s order total. It works well for stores selling products with large price differences.
How to Set Up Shipping Classes in WooCommerce
Shipping classes help you apply different delivery costs to specific products.
This feature is useful when your store sells products with different:
- Sizes
- Weights
- Packaging requirements
- Handling costs
For example, you may want to charge higher shipping fees for bulky or heavy products.
Step 1: Create a Shipping Class
To create a shipping class:
- Go to WooCommerce > Settings > Shipping
- Open the Shipping Classes tab
- Click Add Shipping Class
Add:
- Shipping class name
- Description
- Optional slug
Then click Save Shipping Classes.
Examples of Shipping Classes
You can create classes such as:
- Bulky Items
- Fragile Products
- Lightweight Goods
- Heavy Equipment
Step 2: Add Shipping Class Costs
After creating your shipping classes:
- Go to Shipping Zones
- Select a shipping zone
- Click “Edit” to open the shipping method settings
- Scroll to Shipping Class Costs
Here, you can define separate delivery charges for each shipping class.
For example:
- Bulky Items = R100 shipping fee
- Lightweight Products = R30 shipping fee
WooCommerce will automatically apply these rates during checkout.
Step 3: Assign Shipping Classes to Products
Once your shipping classes are ready, assign them to products.
To do this:
- Go to WooCommerce > Products
- Edit the product
- Open the Shipping section
- Select the correct shipping class
- Click Update
WooCommerce will now apply the correct shipping fee whenever customers purchase that product.
Choosing the Right WooCommerce Fulfillment Option
Shipping setup and order fulfillment often work together. The best fulfillment method depends on your business size, products, and shipping volume.
Fulfillment refers to the entire process of receiving, packing, and shipping customer orders after a purchase is made. In WooCommerce, your fulfillment setup determines how orders are processed, how quickly products are delivered, and who handles storage and shipping. Choosing the right fulfillment method can help reduce shipping delays, improve customer satisfaction, and make order management more efficient.
The two most common WooCommerce fulfillment methods are in-house fulfillment and dropshipping.
In-House Fulfillment
In-house fulfillment means you manage:
- Inventory storage
- Packaging
- Shipping
- Order handling
Many ecommerce businesses start with in-house fulfillment because it offers greater control over the customer experience.
This method works well for:
- Handmade products
- Custom products
- Small ecommerce stores
- Businesses that want branded packaging
However, managing fulfillment yourself can become time-consuming as your business grows.
Dropshipping
Dropshipping allows suppliers to handle inventory and shipping for you.
When a customer places an order:
- The order goes to the supplier
- The supplier packs the product
- The supplier ships directly to the customer
Dropshipping reduces overhead costs because you don’t need to store inventory yourself.
However, it also comes with disadvantages, including:
- Less control over shipping times
- Limited packaging customisation
- Dependence on suppliers
- Longer international delivery times
For some ecommerce businesses, dropshipping offers a simple way to scale operations quickly.
Final Thoughts
Setting up WooCommerce shipping options correctly helps create a better customer experience while improving your store’s operational efficiency. By configuring shipping zones, shipping methods, rates, and shipping classes, you can offer accurate delivery costs and flexible shipping solutions for your customers.
Whether you choose in-house fulfillment or dropshipping, WooCommerce gives you the tools you need to manage ecommerce shipping effectively. With the right setup, you can streamline your checkout process, reduce shipping confusion, and build a more professional online store.
Need Help with Your Website?
Please feel free to contact us if you need help with your e-commerce website. Visit our home and services pages for more about us and what we do.

Cimeron Collins
Cimeron is an artist and designer based in Edenvale, South Africa, with over 30 years of experience in the printing and publishing industries.
He’s also an avid WordPress enthusiast who strives to stay up to date with the latest trends in web design and development, constantly exploring new technologies and refining his skills.

Leave a Reply