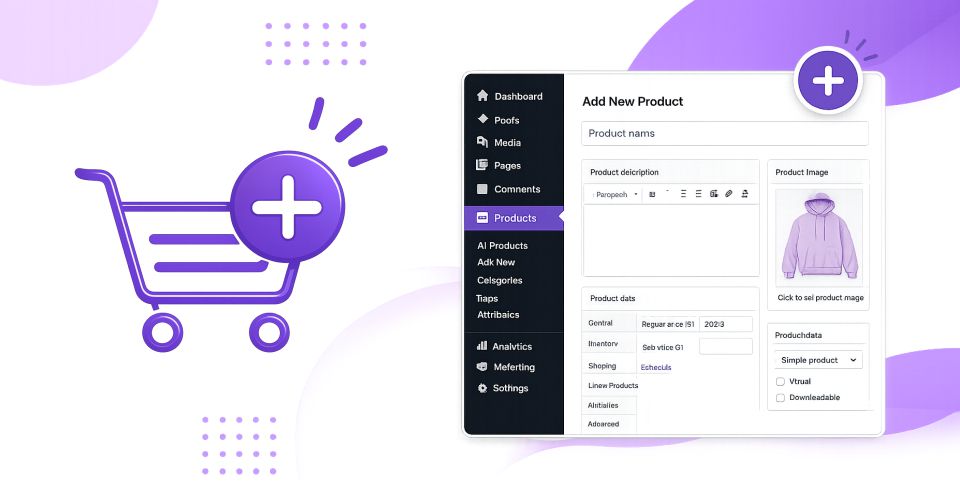
If you’re running an online store with WooCommerce, adding products is one of the most important tasks you’ll perform. Whether you’re selling physical products, digital downloads, subscriptions, or services, WooCommerce makes it simple from your WordPress admin dashboard.
In this guide, you’ll learn how to add products in WooCommerce step-by-step, including product descriptions, pricing, images, categories, and more.
What You Need Before Adding Products
Before you begin, make sure you have:
- A WordPress website
- WooCommerce installed and activated
- Product details ready, including:
- Product name
- Description
- Price
- Images
- SKU (optional)
- Shipping details
Once everything is ready, you can start adding products to your store.
Read more on How to Build an E-Commerce Website with WordPress.
Why Use a Local WordPress Installation?
You can install WordPress on your computer to build your site offline. This approach lets you:
- Test your design safely
- Learn without risk
- Build your store before going live
Once you feel satisfied, you can move your site to a live server.
For more information on how to install WordPress on your own computer, please see my article The How and Why of Installing WordPress on Your Own Computer.
Step 1: Log in to Your WordPress Dashboard and Navigate to Products
Login to your WordPress website to access the admin panel.
From the left-hand menu select Products > Add New.
This opens the WooCommerce product editor where you can create a new product listing.
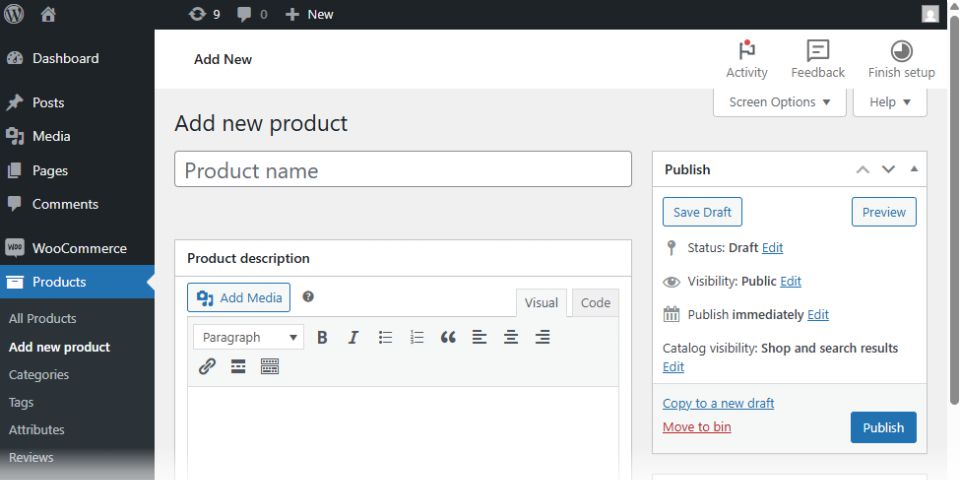
Step 2: Add the Product Name and Description
At the top of the page:
Product Name
Enter the name of your product.
Example:
- Wireless Bluetooth Headphones
- Handmade Leather Wallet
- Organic Coffee Beans
Product Description
In the large text editor, write a detailed description of the product.
Include:
- Key features
- Benefits
- Specifications
- Materials or ingredients
- Usage instructions
Tips for Better Product Descriptions
- Use clear and simple language
- Focus on benefits, not just features
- Include keywords for SEO
- Break content into short paragraphs or bullet points
Product Short Description
The Product Short Description in WooCommerce is a brief summary that appears near the product title and price on the product page. It gives customers a quick overview of the item before they read the full description.
The product short description is optional. If you don’t enter a short description, an excerpt of your main product description will be displayed.
A good short description should highlight the main product features. Keep it clear, concise, and easy to scan. Focus on the most important selling points that help customers decide quickly whether the product is right for them.
Step 3: Choose the Product Type
Scroll down to the Product Data section.
WooCommerce allows several product types:
Simple Product
A standard product with no variations.
Example:
- A book
- A mug
- A T-shirt
Variable Product
Products with options like:
- Size
- Color
- Style
Example:
- T-shirts with multiple sizes and colors
Grouped Product
Grouped products are a collection of related products.
External/Affiliate Product
Affiliate products are products sold by another company or seller that you promote on your website in exchange for a commission. Instead of managing stock or shipping yourself, you earn a percentage of each sale made through your unique affiliate link. In WooCommerce, affiliate products direct customers to an external website where they can complete their purchase.
Step 4: Set the Product Price
Inside the Product Data box:
Regular Price
Enter the standard selling price.
Sale Price
The sale price field is optional. Add a discounted price if applicable.
WooCommerce automatically displays the discount if a sale price is entered.
Step 5: Add Product Images
Images are crucial for online sales.
Product Image
On the right sidebar:
- Click Set Product Image
- Upload or select an image from the media library

Use:
- High-quality images
- Clear backgrounds
- Consistent sizing
- Add descriptive alt text to the product image to improve accessibility and SEO
Product Gallery
Add multiple images to showcase different angles or variations.
Step 6: Add Product Categories and Tags
Categories
Help organise your store.
Examples:
- Clothing
- Electronics
- Home Decor
Tags
Use descriptive keywords.
Examples:
- Summer
- Wireless
- Handmade
Proper categorisation improves navigation and SEO.
Step 7: Configure Inventory Settings
Go to Product Data > Inventory.
Here you can add:
- SKU number
- Stock quantity
- Stock status
- Backorders
Enable Manage Stock if you want WooCommerce to automatically track inventory.
Step 8: Set Shipping Information
For physical products, configure shipping details under Product Data > Shipping.
Add:
- Weight
- Dimensions
- Shipping class
This helps calculate shipping costs accurately.
Step 9: Add Product Attributes and Variations
If you’re selling variable products:
Add Attributes
Examples:
- Size
- Color
- Material
Create Variations
Generate combinations such as:
- Small / Red
- Medium / Blue
- Large / Black
Each variation can have:
- Different prices
- Separate stock levels
- Unique images
Step 10: Optimise for SEO
To help products rank on search engines:
Use SEO Plugins
Popular options include:
- Yoast SEO
- Rank Math
SEO Best Practices
- Include keywords naturally
- Write unique descriptions
- Add alt text to images
- Use readable URLs
Step 11: Publish Your Product
Once everything is complete, click the Publish button on the right side.
Your product will now be live on your WooCommerce store.
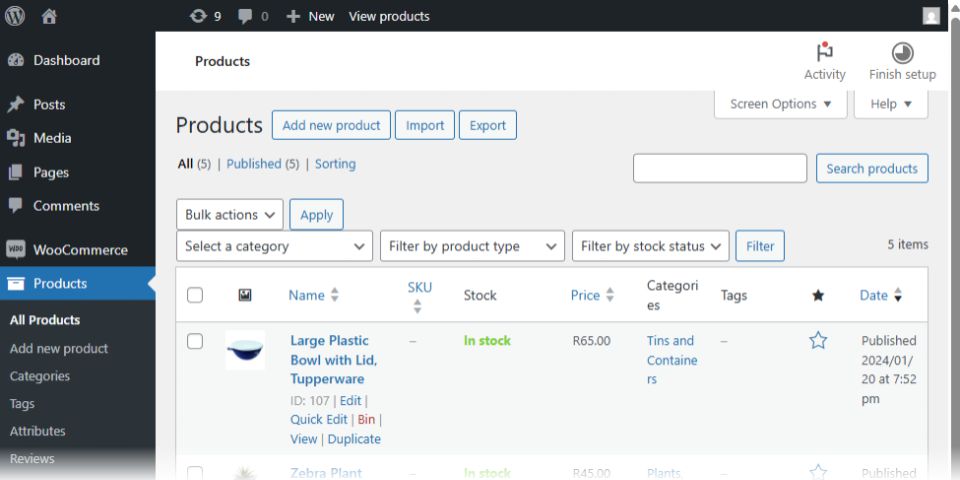
How to Edit Existing Products
To update a product later go to Products > All Products.
Select the product you want to edit, make changes, and click Update.
Common WooCommerce Product Tips
- Use High-Quality Images
Good visuals increase trust and conversions. - Keep Descriptions Clear
Avoid long blocks of text. - Add Customer Reviews
Reviews improve credibility and SEO. - Monitor Stock Levels
Prevent overselling by managing inventory regularly. - Test Mobile Appearance
Ensure products look great on smartphones and tablets.
Final Thoughts
Adding products in WooCommerce is straightforward once you understand the process. By properly setting up product details, images, pricing, inventory, and SEO, you can create a professional online store that delivers a better shopping experience for customers.
Whether you’re launching your first product or managing hundreds of items, WooCommerce gives you the flexibility and tools needed to grow your ecommerce business successfully.
Need Help with Your WooCommerce Content?
Please feel free to contact me if you need help with WooCommerce product content, website copywriting, creating custom images, or adding products to your online store. Let’s build a package that works for your goals and budget. Visit my home and services pages for more information about me and the services I offer.

Cimeron Collins
Cimeron is an artist and designer based in Edenvale, South Africa, with over 30 years of experience in the printing and publishing industries.
He’s also an avid WordPress enthusiast who strives to stay up to date with the latest trends in web design and development, constantly exploring new technologies and refining his skills.

Leave a Reply