Your WordPress user profile is part of the WordPress admin area and it’s where you’ll find your personal information and preferences. Any user that is able to login to your website will have a user profile, regardless of their user role. In this article we’ll take a look at WordPress user roles, how to edit your user profile and what the various settings mean.
WordPress User Roles
All user roles allow users to edit and update their user profile. There are however some settings that are only available to administrators.
There are five main WordPress user roles that determine the type of access and privileges a user has when editing their user profile :-
Subscriber
A subscriber is the most basic of all the user roles in WordPress as it only allows the user to read posts. If you have a subscription based website or have content that is only available to members, a subscriber role will allow a user to create a profile and log in to the specific areas of your website.
The subscriber role can also be used for users to log in to comment on posts.
Contributor
Contributors can add new posts and edit their own posts. A user with the contributor role however, can’t publish or delete posts, this includes their own. Contributors are also not able to add images or media files to their posts. This role is useful for a one-time guest blogger or a new author.
Author
Authors can write, edit, publish and delete their own posts. They can also upload files but are not able to edit other users posts or pages. An author can also tag posts and assign them to categories but they can’t create new categories.
Editor
An editor’s role is mostly to oversee content and not to manage the website. Editors can access all posts to edit and publish as well as delete posts and pages. Editors can also manage categories, links and comments.
Administrator
Administrators have access to all parts of a website. They have all the permissions of the other roles and are able to change themes and add plugins. An administrator can also manage and edit users.
Edit Your WordPress User Profile
Accessing Your Profile
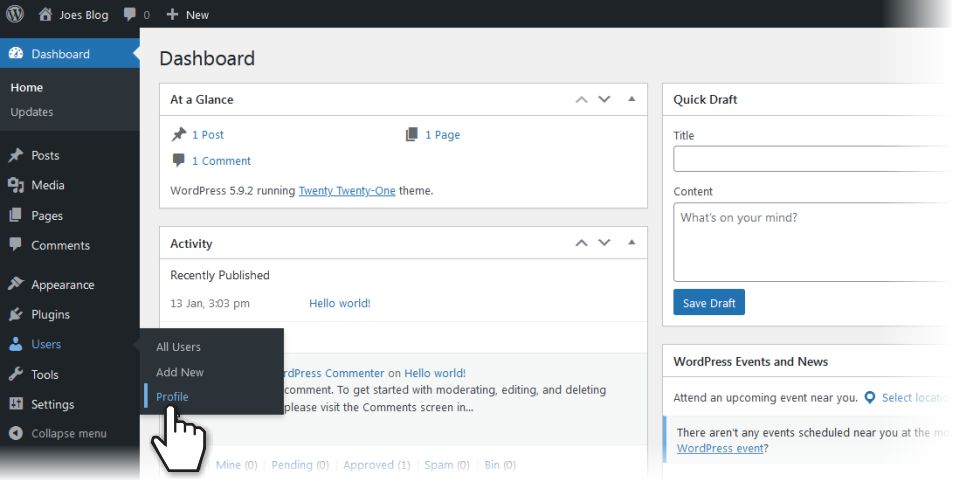
To access your user profile, you’ll need to log in to your WordPress admin dashboard and go to Users > Profile.

The WordPress User Profile Screen
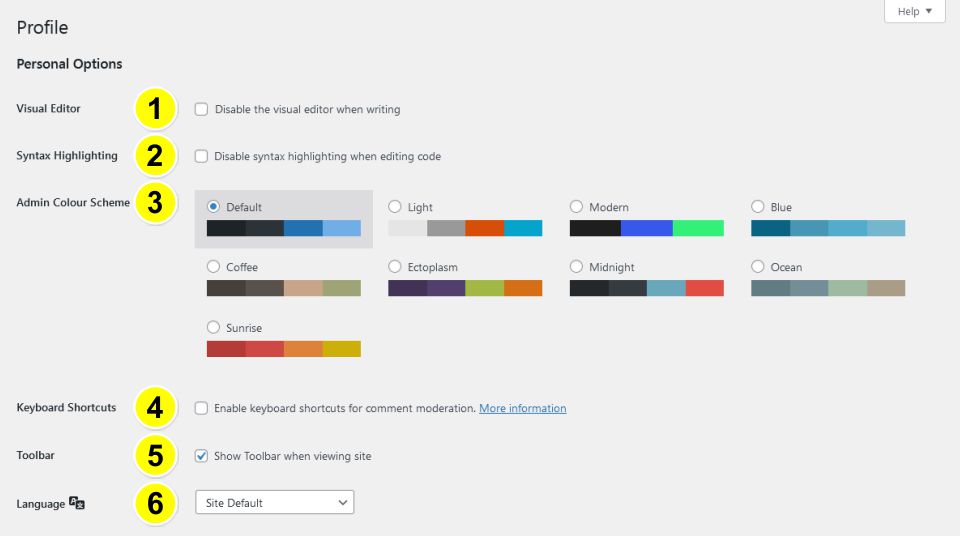
The first part of the user profile area relates to your personal options. Let’s take a closer look.

1. Visual Editor
Check this box if you want to disable the visual editor when writing. In most cases you won’t need this unless you prefer to work with the source code.
2. Syntax Highlighting
Syntax highlighting is a feature used in text editors where multiple colours and fonts are used to help you read and understand code. You normally won’t need to disable this.
3. Admin Colour Scheme
Here you can choose a different colour scheme for your admin area. I have never changed the colours on any of my websites, but it’s easy enough if you prefer one of the other colour schemes.
4. Keyboard Shortcuts
This can be useful but not necessary unless you spend a lot of time moderating comments.
5. Toolbar
Here you can choose to display the black toolbar at the top of your screen when you view your site. This is normally enabled by default.
6. Language
This is the language used in your admin area. You can normally choose between the site default and English (United States). We localise our websites to English (South Africa).
The next section is important because it controls how your name is displayed publicly on your website. Let’s take a look at the Name section.

7. Username
This is the name you use to log in to your WordPress account and it can’t normally be changed in the admin area. If you are the administrator of your site, this is will be the name you used when you created the WordPress website. Please read my article Changing Your Admin Username in WordPress for reasons you may need to change your username and how to do it.
8. First Name
You can enter your real first name here.
9. Last Name
Your last name or surname goes here.
10. Nickname
This is a required field and you can enter anything here. It’s a good idea to use something other than your username or real name.
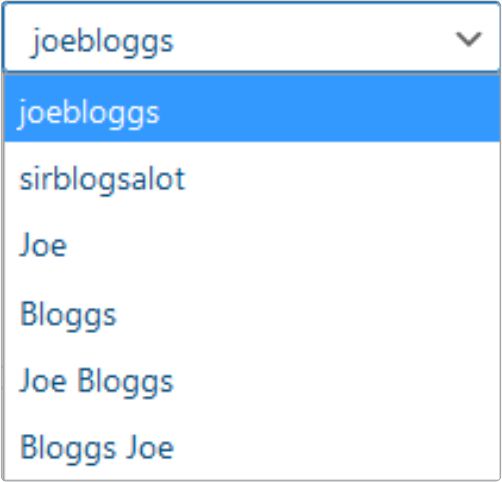
11. Display Name
Here you can choose how WordPress publicly displays your name. You can select your username, first name, last name, nickname etc.

The next section deals with your contact information.

12. Email
This is the email address associated with your account.
13. Website
This field is available to all users to add their own website to their profile.
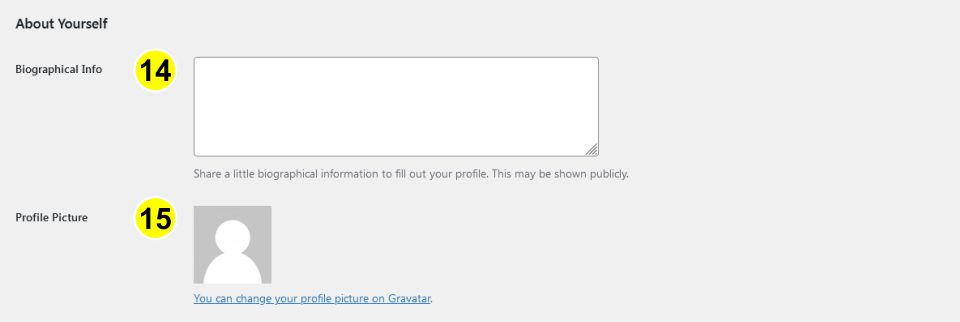
Let’s move on to the About Yourself section.

14. Biographical Info
The biographical information field gives you the space to write a little about yourself. This may be displayed with your blog posts in some themes. It can also be used on your public profile if your site is a forum or social media platform.
15. Profile Picture
The profile picture is powered by Gravatar, a service offered by Automattic, the creators of WordPress. To set up your Gravatar, you’ll need to click on the link and follow the instructions.
The last section in the WordPress User Profile Area covers Account Management and Application Passwords.
Account Management
Under account management you can set a new password for your your account. You can also log out of any other locations in case you leave your account open on another device.
Application Passwords
The application passwords section is relatively new to WordPress and is meant for advanced users. It allows you to create passwords for third party applications to access the REST-API.
To finish editing your WordPress user profile, click on the Update Profile button. This will save the information you’ve updated or changed.
Please share this article if you found it useful


Leave a Reply