
Updating to the latest version of WordPress is important for both the security and performance of your website. You can normally complete the update with just a few clicks in your admin dashboard. If you experience problems updating with the automated method, you can still manually update your site.
In this article we’ll show you how to manually update your website to the latest version of WordPress.
How Do You Know When There’s Update Available?
You will always see a notification at the top of your admin screen when there’s an updated version of the WordPress software available.

All you need to here is click on the Please update now link. This will take you to the Updates screen where you simply click on the Update to version… button.

WordPress will now get the latest version of the software and install it for you.
This is very straight forward and should work most of the time. If the automated update doesn’t work for some reason, you may need to manually update WordPress. (We have occasionally had to do this on our locally hosted test and development sites).
Before You Update Your Website
It’s important to make a complete backup of your website before updating. The backup will allow you to restore your site if something goes wrong.
Your backup should include the following:-
- Your WordPress database
- All your image and media files
- Your plugins and themes
- The core WordPress files
Manually Updating WordPress
In order to manually update WordPress on a live site, you will need server access and an FTP client like FileZilla. In our example, we’re going to manually update a locally hosted site to the latest version of WordPress so we have direct access to the files. The process will be much the same for a live site with FTP.
Step 1 – Download the Latest Version of WordPress
You can download the latest version of WordPress from wordpress.org.
- Click on the Get WordPress button
- On the downloads screen, scroll down and click on the Download button.
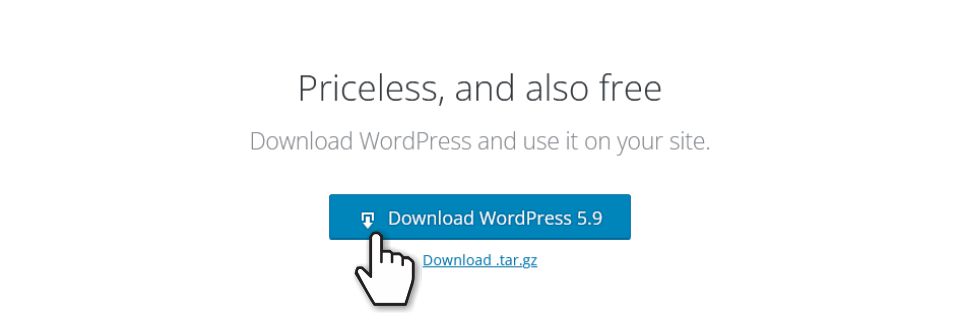
When the download is complete, unzip the contents of the downloaded file into a folder on your computer so that you can find them later.
Step 2 – Deactivate Plugins
Our next step is to deactivate all the plugins in the website we’re updating.

In your admin area, go to Plugins and deactivate all your plugins.
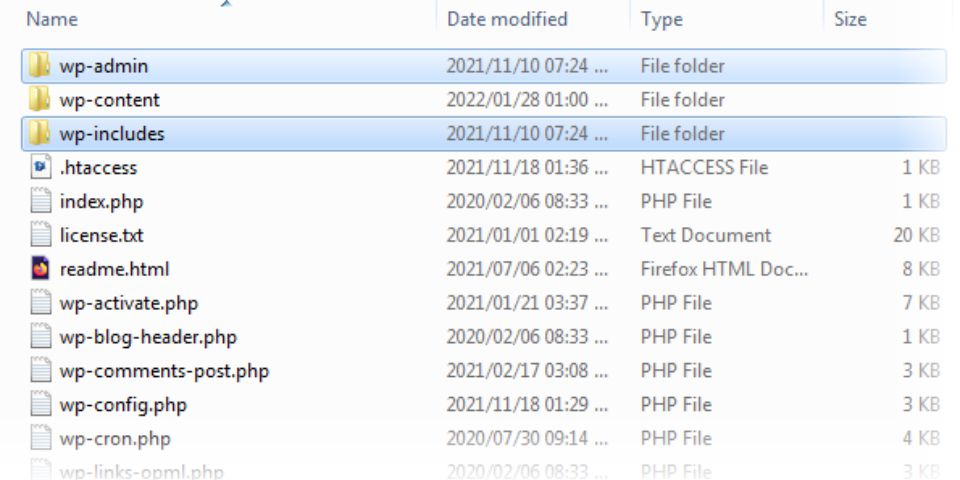
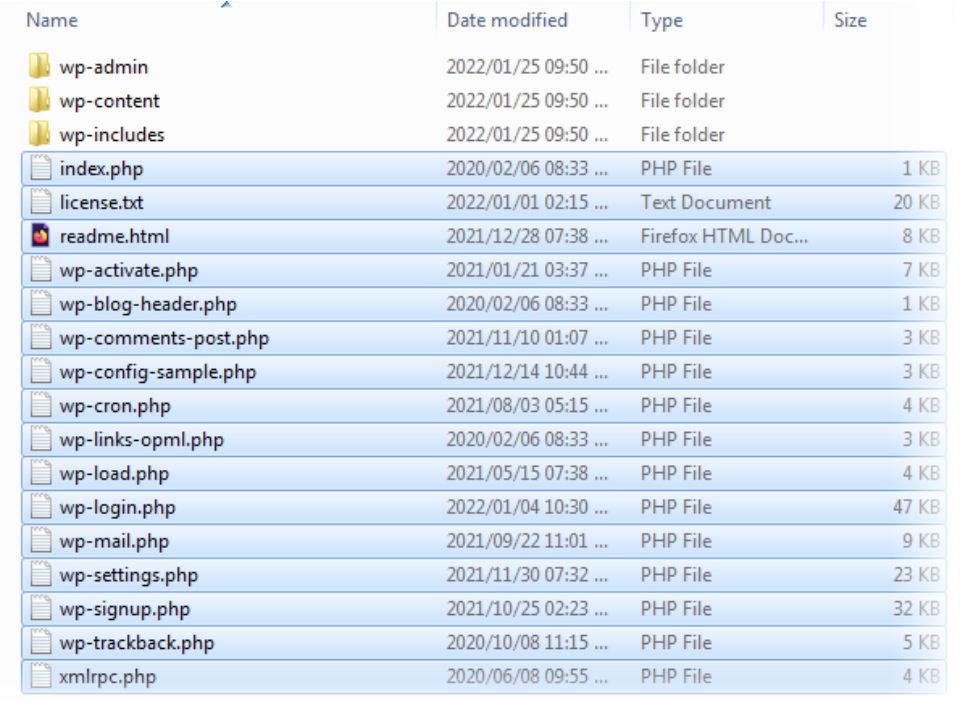
Step 3 – Delete the wp-includes and wp-admin Folders
Navigate to your WordPress installation files in your file manager or FTP client and delete the wp-includes and wp-admin folders. For a live site, they will usually be in the public_html folder.
Step 4 – Copy or Upload the Update Folders
Copy the new wp-includes and wp-admin folders from the update we downloaded in step 1 to the WordPress installation folder. If you’re updating a live site, you will be uploading the folders to your server.
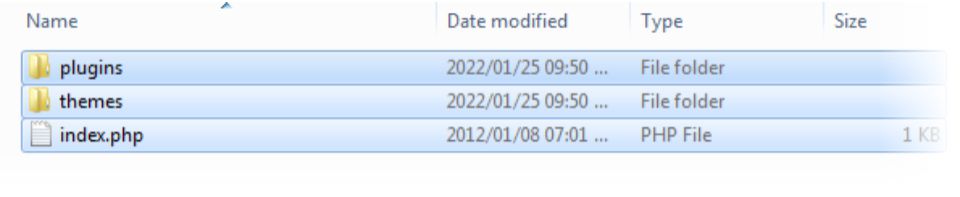
Step 5 – Copy the Contents of the wp-content Folder
Copy the contents of the new wp-content folder to your WordPress installation. This will only overwrite the existing files with the new versions and any unique files won’t be affected.
Step 6 – Copy the Files from the Root Folder
Copy all the files from the new root folder to your WordPress installation. This will overwrite any files with the same name.
Step 7 – Refresh WordPress and Update the Database
All that’s left to do now is to refresh WordPress in your browser, update the database if necessary and re-activate your plugins.
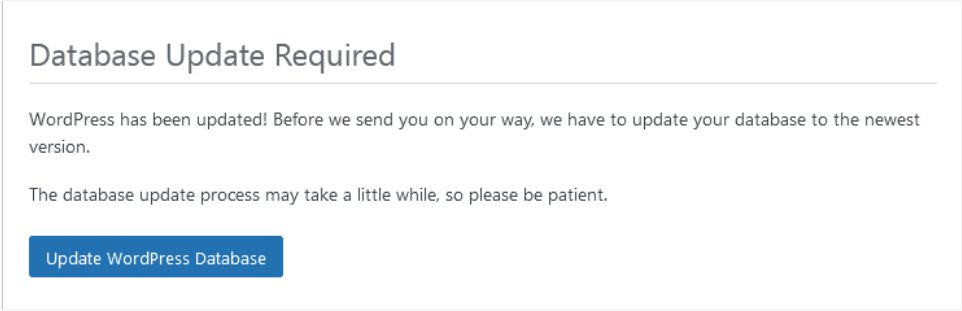
Click the Update button and WordPress will update your database.
Wrapping Up
You should now have successfully updated your website to the latest version of the WordPress software.
If you need help or advice with your WordPress website, please feel free to contact us. Visit our home and services pages for more about us and what we do.

Cimeron Collins
Cimeron is an artist and designer based in Edenvale, South Africa, with over 30 years of experience in the printing and publishing industries.
He’s also an avid WordPress enthusiast who strives to stay up to date with the latest trends in web design and development, constantly exploring new technologies and refining his skills.
Please share this article if you found it useful

Leave a Reply